AURIX Development Studio란
AURIX Development Studio는 AURIX 마이크로컨트롤러를 개발하기 위한 통합개발 환경(IDE)입니다. C 컴파일러, 멀티코어 디버거, ILLD(Infineon Low-level Driver) 등이 포함되어 있습니다. 이번 글에서는 AURIX Development Studio를 설치하고 프로젝트를 생성하는 방법을 살펴 보려 합니다.
AURIX Development Studio 설치
AURIX Development Studio가 설치되어 있지 않다면 AURIX™ Development Studio - Infineon Technologies에서 다운받으면 됩니다. 실행파일을 다운로드 받으려면 회원가입이 되어 있어야 합니다.

다운로드 받아서 설치를 진행하면 됩니다.
라이센스에 동의 하기를 선택하고 이후에는 Next를 눌러 설치를 진행하면 됩니다.
DAS (Device Access Server) 설치
보드를 PC랑 연결하려면 DAS (Device Access Server)가 설치되어야 합니다.
DAS는 https://www.infineon.com/cms/en/product/promopages/das/?redirId=53841 에서 설치하면 됩니다.
프로젝트 생성하기
설치가 완료되면 AURIX Development Studio를 실행합니다.
실행하면 아래와 같이 Workspace를 지정하는 창이 뜹니다. 원하는 workspace를 지정하고 Launch를 누릅니다.
이제 프로젝트를 생성해봅니다. 첫 화면 왼쪽 하단 Quick Links에서 Create new AURIX Project를 누릅니다. 혹은 File - New - New AURIX Project를 눌러도 됩니다.
원하는 프로젝트 이름을 입력하고 Next를 누릅니다.
Device와 Board를 입력하는 창이 뜹니다. 자신이 사용하는 보드에 맞게 선택하면 됩니다. 선택을 마치고 Finish를 누릅니다.
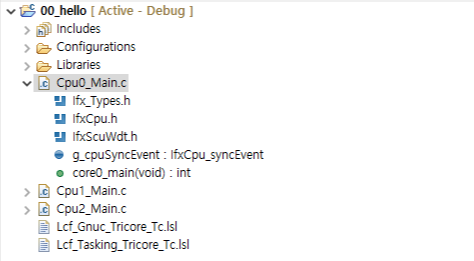
Finish를 누르고 나면 프로젝트가 생성됩니다. C/C++ 프로젝트 창을 보면 생성된 프로젝트를 확인할 수 있습니다. 사용하는 보드는 코어가 3개가 있어 아래 그림과 같이 Cpu0_Main.c, Cpu1_Main.c, Cpu2_Main.c가 생성되었습니다.
프로젝트 빌드하기
Cpu0_Main.c에 원하는 내용을 프로그래밍 합니다.
/**********************************************************************************************************************
* \file Cpu0_Main.c
* \copyright Copyright (C) Infineon Technologies AG 2019
*
* Use of this file is subject to the terms of use agreed between (i) you or the company in which ordinary course of
* business you are acting and (ii) Infineon Technologies AG or its licensees. If and as long as no such terms of use
* are agreed, use of this file is subject to following:
*
* Boost Software License - Version 1.0 - August 17th, 2003
*
* Permission is hereby granted, free of charge, to any person or organization obtaining a copy of the software and
* accompanying documentation covered by this license (the "Software") to use, reproduce, display, distribute, execute,
* and transmit the Software, and to prepare derivative works of the Software, and to permit third-parties to whom the
* Software is furnished to do so, all subject to the following:
*
* The copyright notices in the Software and this entire statement, including the above license grant, this restriction
* and the following disclaimer, must be included in all copies of the Software, in whole or in part, and all
* derivative works of the Software, unless such copies or derivative works are solely in the form of
* machine-executable object code generated by a source language processor.
*
* THE SOFTWARE IS PROVIDED "AS IS", WITHOUT WARRANTY OF ANY KIND, EXPRESS OR IMPLIED, INCLUDING BUT NOT LIMITED TO THE
* WARRANTIES OF MERCHANTABILITY, FITNESS FOR A PARTICULAR PURPOSE, TITLE AND NON-INFRINGEMENT. IN NO EVENT SHALL THE
* COPYRIGHT HOLDERS OR ANYONE DISTRIBUTING THE SOFTWARE BE LIABLE FOR ANY DAMAGES OR OTHER LIABILITY, WHETHER IN
* CONTRACT, TORT OR OTHERWISE, ARISING FROM, OUT OF OR IN CONNECTION WITH THE SOFTWARE OR THE USE OR OTHER DEALINGS
* IN THE SOFTWARE.
*********************************************************************************************************************/
#include "Ifx_Types.h"
#include "IfxCpu.h"
#include "IfxScuWdt.h"
#include <stdio.h>
IfxCpu_syncEvent g_cpuSyncEvent = 0;
int core0_main(void)
{
IfxCpu_enableInterrupts();
/* !!WATCHDOG0 AND SAFETY WATCHDOG ARE DISABLED HERE!!
* Enable the watchdogs and service them periodically if it is required
*/
IfxScuWdt_disableCpuWatchdog(IfxScuWdt_getCpuWatchdogPassword());
IfxScuWdt_disableSafetyWatchdog(IfxScuWdt_getSafetyWatchdogPassword());
/* Wait for CPU sync event */
IfxCpu_emitEvent(&g_cpuSyncEvent);
IfxCpu_waitEvent(&g_cpuSyncEvent, 1);
int a = 3;
int b = 7;
int c = 0xABCD1234;
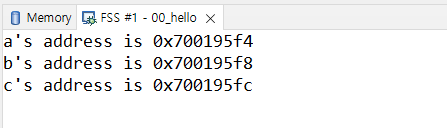
printf("a's address is 0x%p\n", &a);
printf("b's address is 0x%p\n", &b);
printf("c's address is 0x%p\n", &c);
while(1)
{
}
return (1);
}
Project - Build all을 눌러 빌드하면 됩니다. 혹은 단축키 ctrl+b로 빌드할 수 있습니다.
프로젝트 디버깅하기
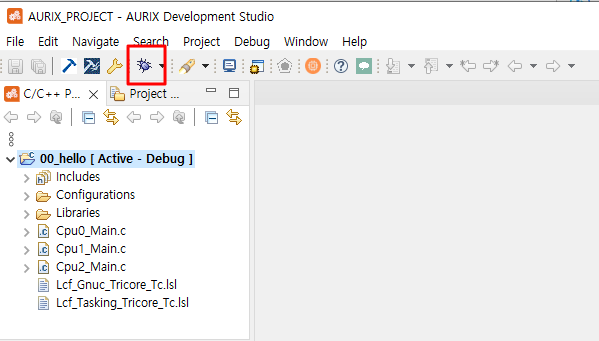
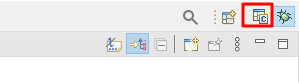
프로젝트를 디버깅하려면 아래 그림과 같이 벌레 아이콘의 디버깅 버튼을 누릅니다.
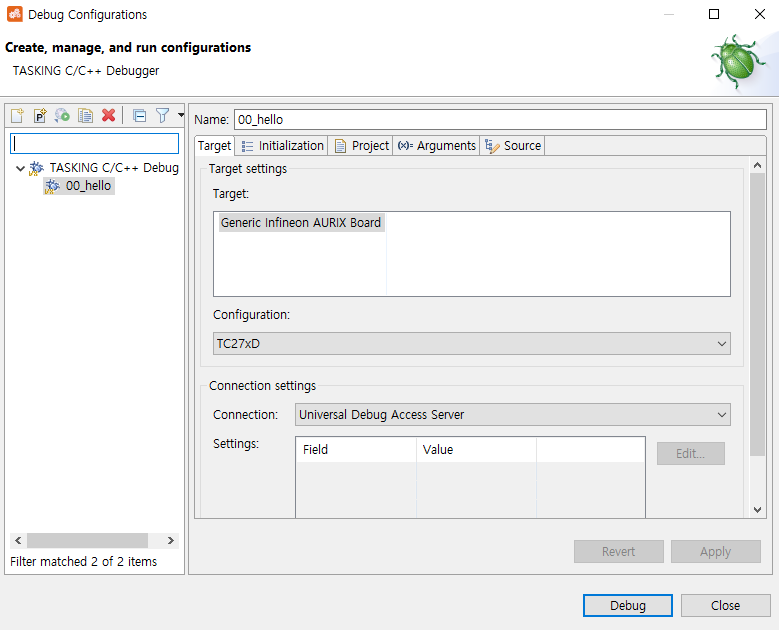
아래와 같은 창이 뜨면 Debug를 누릅니다.
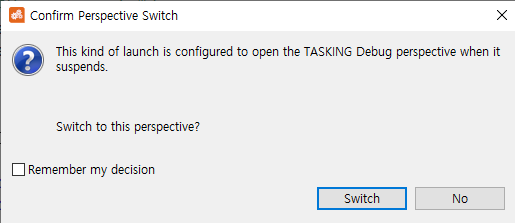
창을 디버깅 모드에 맞게 재배치 하겠냐는 창이 뜹니다. Switch를 누릅니다.
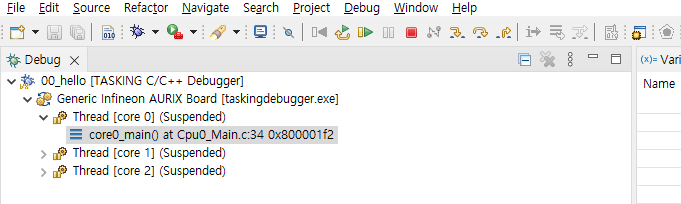
디버깅 모드가 잘 실행된 것을 확인할 수 있습니다
디버깅 화면에서 다시 기존화면으로 돌아오고 싶으면 오른쪽 상단의 C라고 적혀있는 버튼을 누르면 됩니다.
'Embedded System > AURIX' 카테고리의 다른 글
| AURIX Development Studio 예제 코드 임포트하는 방법 (0) | 2023.04.16 |
|---|
